Wednesday 24 March 2010

Thai Chicken Risotto cooked in Mr D's Thermal Cooker


This is a great risotto for those who like Thai flavours. You could substitute or add prawns and the addition of peas would be nice.

INGREDIENTS
  • 2 tbsp of vegetable oil
  • 1 tbsp of butter
  • 1 large onion, diced
  • 1 clove of garlic, finely chopped
  • 2 chicken breasts, cut into cubes
  • 1 tbsp of Thai green paste
  • 3 tbsp of fish sauce
  • 225g of risotto rice
  • 600ml of chicken stock
  • ½tsp of fresh ground pepper

METHOD

  1. Put the oil and butter in the inner pot.
  2. Heat over a medium heat until the butter melts.
  3. Add the onions and garlic and cook until the onion is soft. Don't let it colour.
  4. Add the chicken and Thai paste.
  5. Cook stirring for 1 minute until the chicken is sealed.
  6. Add the rice and stir well.
  7. Add the stock, fish sauce and pepper. Stir and bring to the boil.
  8. Once boiling turn down to a simmer for 2 to 3 minutes.
  9. Give the mixture a stir before putting on the lid and transferring the inner pot to the insulated outer container.
  10. Shut the lid and leave to thermal cook without power for a minimum of 1 hour.

Wednesday 24 June 2009

No Knead and No Oven Bread - cooked in a thermal cooker

This recipe is adapted from the now famous no knead bread recipe developed by Jim Lahey of Sullivan Street Bakery, Manhatten.
It was first published in the New York Times in November 2006 and has become one of the most talked about recipe on the internet.


The Ingredients:

1½ cups of bread flour.
1 to 1½ tsp of salt (depending on your taste).
⅛ tsp of instant dried yeast.
1 cup of tepid water.
You also will need a tin to bake the bread in that will fit into the inner pot of the thermal cooker. A round cake tin will do fine. This tin needs to be greased.


Method:
  1. Mix all the dried ingredients together in a bowl before mixing in the water. You don’t need to beat.
  2. Cover the bowl with cling film. Leave it in a warm place for around 12 hours.
  3. Sprinkle a good layer of flour onto a piece of parchment paper and flour your hands well before scooping the dough out of the bowl and putting it onto the parchment paper.
  4. Spread the dough out a bit and simply fold the dough sides over each other. Then fold the bottom to the top.
  5. Turn the dough over and shape it gently so it fits in the tin before placing it on a trivet in the inner pot and putting the lid on.
  6. Put the inner pot into the outer pot. Shut the lid and leave for 2 hours to rise again.
  7. After two hours remove the inner pot.
  8. Remove the tin from the inner pot and make sure it has risen before covering it with either recycled aluminium foil (eco care or similar) or baking parchment paper. Remember to make a handle to lift it out once cooked.
  9. Put it back into the inner pot and fill with hot water to come ¾ up the side of the pan before putting on a heat source and bringing it to the boil.
  10. Once boiling turn down to a simmer for 20 minutes.
  11. Put the lid on the inner pot and put the pot into the outer pot for 2 hours.
  12. When cooked remove and turn out onto a rack to cool.


Sunday 24 May 2009

Cooking Rice

Probably like you, many of the meals I cook, involve serving them with rice and if you own a thermal cooker there are two way to deal with this.
As my Shuttle Chef has only one inner pot (some thermal cooker have two) I can either put a trivet in the bottom (its legs in the food) and put something like my cake tin containing part boiled rice on the trivet or I can cook my rice about 30 minutes before I want to eat in a separate saucepan.

In the past I have tried many methods of cooking rice. These include Jamie Oliver's rice cooking method from his book "Ministry of Food" and Madhur Jaffrey's methods from her book "Illustrated Indian Cookery". All of these work but take far more time than my method and do not seem to be any better.

Ingredients:
  • 1/2 cup of rice per person. I always use Basmati rice except for when I am cooking Thai food. With Thai I prefer Jasmine rice.
  • 1 cup of water for each 1/2 cup of rice.
  • Salt to taste.

Method:


  1. Add the water to a saucepan.
  2. Add salt tasting the water until you can taste the salt. Vary the amount to your taste but remember if you can't taste the salt in the water your rice will tend to be bland.
  3. Bring the water to the boil.
  4. Pour the rice into the boiling water and bring it back to the boil.
  5. Boil it gently (a rolling boil) for 5 minutes.
  6. Turn off the heat and put a lid on the pan.
  7. Leave for about 30 minutes and you then will have perfectly cooked rice.
  8. Before serving fluff up with a fork.

Saturday 23 May 2009

Useful guide to cooking times

I though that today I would post this useful little chart from The Thermal Cooker site. It will give you a basic idea of cooking times for your own menues. Most slow cooker recipes can be used in the thermal cooker and by using either the times in a similar recipe or the times below you should end up with a perfectly cooked meal.

Food:

Simmer time after bringing to the boil:

Thermal cooking time:
Rice5 mins1 to 1.5 hours
Potatoes5 mins1 to 2 hours
Soup & Stock10 mins2 to 3 hours
Green Lentils10 mins3 to 4 hours

Pintos

10 mins3 hours
Split Peas10 mins2 hours
Quinoa5 mins1.5 hours
Millet5 mins1 hours
Polenta1 mins1 hours
Winter Squash5 mins1 to 2 hours
Steamed bread 30 mins3 hours
Chicken6 mins2 to 3 hours
Beef13 mins3 to 4 hours


Friday 22 May 2009

Stocks - There are basic stocks in Mr D's Thermal Cook Book

Stocks are something that is ideally made in a thermal cooker. They are great to have in the freezer ready for use with soups, gravy or risotto.
The method of making them is the same. Once you have added the ingredients, brought them to the boil simmer for ten minutes then put in the thermal cooker and left for up to 8 hours. It is important to make sure the cooker inner pot is filled at least up to 3/4 to retain the heat for the longer cooking. Remember you can always freeze the stock (by putting 500ml portions into small freezer bags) so I always fill my Shuttle Chef to the top. If you are not freezing it keep it in the fridge until required.

If you are making a meat based stock to use for soups don't remove the layer of fat from the surface until you are ready to use it as this forms a seal to keep out the air.


VEGETARIAN ORIENTAL VEGETABLE STOCK:

To make this stock you need to keep your vegetable trimmings for a few days. Keep them in the fridge in a bag until you are ready to make the stock.


Ingredients:


  • 3/4 fill your inner pot with water.

  • 1 tbls of black peppercorns.

  • 4 star anise.

  • 6 cardamoms.

  • 1 cinnamom stick.

  • 1 piece of blade mace.

  • 6 cloves.

  • 1 tbls cumin seeds.

  • 1 tbls coriander seeds.

  • 2 bay leaves.

  • 4 curry leaves.

  • 1 stick of celery.

  • 1 green chille (optional)

  • 5cm of ginger chopped. No need to peel.

  • 1 onion chopped.

  • 3 cloves of garlic crushed.

  • A selection of vegetable trimmings chopped roughly.

Bring to the boil. simmer for 10 minutes and then put into the outer insulated pot for 6 to 8 hours. Once ready strain and either freeze or keep in the fridge until ready for use.


Over the next few weeks I will be adding more stocks.

Thursday 21 May 2009

Useful Tip 1 - How to cook for two people.

I was looking at Thermal Cookware site this morning and found this question and answer which I though may be of use to many who use a thermal cooker to cook for only two people.

Question:
Is it possible to cook a small meal as sometimes I do not have enough ingredients to fill a whole pot or I may just want to have enough for one or two people?

Answer:
If you are using the one pot Shuttle Chef you can certainly cook a smaller meal however it would only retain it's core temperature above 60 degrees (food safety standards) for less than 6 to 8 hours, therefore you could prepare a smaller meal in the morning to eat at lunch time or at lunch time to eat at dinner (say 4 hours later). Or you can bring the inner pot back up to the boil 4 hours later so that it would have another 4 hours before dropping below food safety standards.

When I have been cooking a small amount I have often put this in my cake tin which I cover with baking parchment and then put this on a trivet in the inner pot filled with enough water to come 3/4 of the way up the side of the tin. This system seems to work well. This is the same method that is used to cook cakes.

Wednesday 20 May 2009

Boiled fruit cake - Mr D's Thermal Cook Book

I thought today that I would give you a recipe that we have done so many times and always gets great comments when people try it. This fruit cake was one of the first recipes I tried and I couldn't believe how good the cake was. You really must give it a try.

Apart from your thermal cooker you will also need a fixed base cake tin, some baking or greaseproof paper and something to raise the cake tin from the bottom. I use for this a food ring.


THE INGREDIENTS


  • 375 gms of mixed dried fruit.
  • 3/4 of a cup of brown sugar.
  • 1 tsp of mixed spice.
  • Grated rind of an orange.
  • 1/2 a cup of water or orange juice.
  • 1/4 of a cup of whisky you could use sherry instead (optional).
  • 125 gms of butter.
  • 2 lightly beatened eggs.
  • 1 cup self raising flour.
  • 1 cup plain flour.
  • 1/2 tsp of soda bicarb.

OPTIONAL: you can replace the water, liquor and sugar with a 450 gram tin of crushed pineapple.

THE METHOD:


  1. Place the dried fruit into a saucepan with the brown sugar, mixed spice, orange rind, water, liquor and butter.
  2. Bring the mixture to the boil and simmer uncovered for 5 minutes.
  3. Allow the mixture to cool.
  4. Mix in the eggs.
  5. Stir in the sifted flour and soda bicarb.
  6. Line a 16 cm round cake tin or Pyrex dish (one that fits nicely into the inner pot) with baking paper.
  7. Spoon the mixture into this prepared cake tin.
  8. Lay a round of baking paper on top of the cake mixture then cover the tin with a trimmed piece of foil to prevent condensation from seeping in.
  9. Place a trivet or metal pastry ring in the base of the inner pot and rest the cake tin on this. (If you are using the 3 litre pot the cake tin can sit on a folded pad of foil).
  10. Pour enough hot water into the inner pot so that the level comes halfway up the sides of the cake tin.
  11. Bring the water to the boil.
  12. Put the lid on and turn down the heat to simmer gently for 30 minutes.
  13. Turn off the heat and transfer the inner pot into the insulated container for a minimum of 3 to 4 hours.

Note: As the cake cannot dry out or overcook you can actually leave this cake over night before removing it to serve.

Tuesday 19 May 2009

Master stock - Mr D's Thermal Cook Book

Last night I didn't use the Shuttle Chef as we still had some of the Biriani left so I have decided to add my recipe for Master Stock.

Master stock refers to an aromatic, reusable stock used a lot in Cantonese cooking. Once the base stock has been prepared it is then used as a poaching or braising liquid for meat. Chicken is the most common meat cooked in master stock, although duck and pork are also often used.

I have read that in some restaurants in Beijing use master stock that is over 100 years old and it is a wonderful thought that maybe flavours that were created all those years ago are being handed down from generation to generation.

My stock is fairly new and I don't know if in a hundred years someone will still be cooking chicken in it but I do know it gives food a divine texture and flavour.

KEEPING THE STOCK: After use, if the master stock is not be immediately reused it should be boiled, skimmed, strained and cooled quickly to minimise the potential for bacterial growth. The stock should then be refrigerated or frozen until required. Refrigerated stocks may be kept for up to three days, while frozen stocks may be kept for up to a month. If the stock is to be kept longer it must be boiled before being reused.


THE INGREDIENTS:


  • 2 L Water.

  • 4 Cloves Garlic Sliced.

  • 4cm piece of Ginger sliced.

  • 6 spring onions chopped in half.

  • 1 piece of cassia bark (you can substitute cinnamon stick for this).

  • 3 star anise.

  • 3 pieces of dried orange peel. You can buy this at an Asian supermarket or peel an orange (without the white pitch as this is bitter) and dry it slowly in the oven on a very low heat.

  • 250 ml light Soy sauce.

  • 250 ml Shoaxing wine (Chinese cooking wine).

  • 75 g Chinese rock sugar (granulated sugar can be used ).

THE METHOD:

  1. Fill a saucepan with the water. Add the sliced garlic, ginger and shallots, followed by the aromatics.

  2. Add the light soy, shaoxing wine and Chinese rock sugar.

  3. Bring to the boil and taste the stock for balance of flavours. If it requires more salt add a little more soy sauce.

  4. Allow the stock to cool, if not using straight away, strain it through a fine sieve and refrigerate until needed.

  5. Master stock, once cooled, strained and refrigerated can be used again and again.

Replenish the stock with fresh garlic, ginger, shallots and aromatics each time you use it and the flavour will continue to intensify in strength and flavour.

Monday 18 May 2009

Andrews Spare Ribs - from Mr D's Thermal Cook Book

Last night we had some of the family around and I decided to BBQ, I know the weather was not so good but stiff upper lid and all that. I had decided to use the Cobb BBQ for the barbie with Lokkii briquettes.The lokkii briquettes are completely organic and have an organic firelighter so they are both convenient and eco friendly.

I wanted to include spare ribs in the menu as I had some in the freezer. These work well on the BBQ but are even better if cooked slowly in the Shuttle Chef so I put together a simple recipe "Andrews Spare Ribs". The reason they are called this is that a Filipino chef who unfortunately is no longer with us taught me how to cook spare ribs this way and guess what his name was Andrew.

Ingredients:

  • 1 kg Spare Ribs.
  • 1 Red Onion chopped
  • 500ml bottle tomato ketchup
  • 3 cups of water
  • 1 magi stock cube
  • 2 tbsp Lea & Perrins Worcester Sauce
  • 1 cup of Sprite *
  • 1/2 tsp salt

* Sprite is used as a tenderiser.

Method:

  1. Put all the ingredients into your thermal cooker.
  2. Bring top the boil.
  3. Skim off any impurities that form on the surface.
  4. Turn down to a simmer and simmer for 10 minutes.
  5. After 10 minutes put into thermal cooker outer pot.
  6. Leave for minimum 3 hours to cook.
  7. Serve with the lovely rich tomato sauce.


Sunday 17 May 2009

Lamb (or Mutton) Biriani - from Mr D's Thermal Cook Book

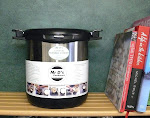
This Indian biriani, adapted for the Shuttle Chef, can be served on its own as a scrumptious meal, or dressed up for a festive occasion with fresh tomato chutney, vegetable curry side-dishes and crunchy popadoms. The lamb (mutton) needs to marinade for an hour at least (overnight if convenient). If you are cooking in the morning and want to save time
then brown the onions the night before.


Ingredients for 6 - 8 servings (halve the ingredients for 3 people).

  • 1 kilo lamb (or muttton) cut into 2 cm cube pieces (I prefer shoulder)

For the marinade


  • 4 green chillies (seeded and finely chopped)

  • Coriander leaves (chopped - about 1 cup full)

  • 1 clove garlic (crushed with salt)

  • 2 teaspoons cumin powder

  • 1 teaspoon chilli powder

  • 1 teaspoon garam masala

  • 1 small carton plain yoghurt (approximately 2 large serving spoons)

For the biriani:


  • 4 medium onions (thinly sliced)

  • Oil or ghee (about 1 desertspoon)

  • 1/2 kilo potatoes (can be either old potatoes peeled and cut into large chunks, or new potatoes halved)

  • Pinch of saffron (optional, but adds a suble flavour)

  • 3 cups of long grain Basmati or Patna rice

For garnish


  • 100 gms cashew nuts (or shredded almonds)

  • 125 grams sultanas

Method:


  1. Cut the lamb (mutton) into cubes.

  2. Chop the chillies finely, crush the garllic, chop the coriander leaves and mix all with the spices and yoghurt.

  3. Coat the meat with the marinade, cover and put in the fridge for 1 hour or longer.

  4. Chop the onions, then fry in ghee or oil until golden with some browning (they should taste sweet). Remove from pan.

  5. Add a little ghee or oil to the pan and heat marinaded lamb to seal the meat. (I prefer to add the meat a third at a time so that it is easier to turn.)

  6. When the lamb is simmering hot, add the potatoes and 1/2 the fried onions. Stir well and bring back to simmer.

  7. Mix the rice with 5 cups of boiling water and 1 desertspoon of salt.

  8. Put the saffron in 1/2 cup hot water.

  9. Stir 1/2 the rice into the lamb and potatoes, then spoon the other 1/2 of the rice and water on top.

  10. Sprinkle the saffron water onto the top of the rice.

  11. Make sure it is all simmering hot, put the lid on the Shuttle Chef pan and place it in the Shuttle Chef.

  12. Leave to cook in the Shuttle Chef for 2 1/2 hours to get really tender, succulent meat. (You can leave the biriani cooking in the Shuttle Chef for up to 7 hours - the tatse is superb and the rice is still separate.)

To serve

Heat the remaining 1/2 of the browned onions, then add the nuts and sultananas. Stir occasionally until heated (the sultanas will plump). Open the Shuttle Chef and stir the onion, nuts and sultana garnish into the top layer of rice. Serve with Tomato Chutney.

Tomato Chutney


  • 1 small green chilli (deseed and chop very finely)

  • 1/2 medium onion (chop finely) I prefer sweet red onion.

  • 3 large or 4 medium toamtoes (chopped)

  • 1 desertspoon vinegar1 teaspoon sugar

  • Good pinch salt

Method:

Stir all ingredients together, cover and leave in a cool place for flavours to blend.

Saturday 16 May 2009

Poached Guinea Fowl with Vegetables - from Mr D's cookbook.


Last night we wanted something light so I put together this delightful dish of poached guinea fowl with vegetables. I served it with the perfectly cooked vegetables and drizzled over the light stock created from the poaching liquid. By poaching the guinea fowl it is moist and takes on the wonderful flavours of the fennel and other vegetables.
There was enough for 3 people but as there was only two I saved the stock we had left over, shredded the remaining Guinea fowl into it and will have it as a soup today. You could use the same recipe with chicken.


Ingredients
:


  • 1.5kg Guinea fowl

  • 6 carrots peeled and cut into 5cm chunks.

  • 2 medium leeks cleaned and cut into 5cm lengths.

  • 20 small potatoes washed but not peeled.

  • 1 fennel bulb sliced.

  • 4 celery sticks halved.

  • 1 bay leaf.

  • Water.

  • 2 Vegetable stock cubes or my preferred way of making stock is to use Marigold Swiss Vegetable Bouillon Powder (obtainable from most supermarkets) . If using this add 1 tablespoon.

  • Salt and freshly ground pepper.

Method:


  1. Wash the guinea fowl.

  2. Place the guinea fowl into the inner pot of the thermal cooker.

  3. Add the carrots and leeks into the pot.

  4. Add the sliced fennel bulb, celery and the potatoes.

  5. Put enough water to cover all the ingredients in the pot.

  6. Add the stock cubes or powder.

  7. Bring to the boil.

  8. Turn down the heat to a simmer and put the lid on the pot.

  9. Simmer for 10 minutes then put the inner pot into the outer pot.

  10. Shut the leave and leave for a minimum of 2 hours to cook..

  11. Once cooked adjust the stock for seasoning.

  12. Serve spooning some of the stock over the guinea fowl.

Friday 15 May 2009

Julia & Julia - A new movie with Meryl Streep

Julia Child (born Julia Carolyn McWilliams August 15, 1912 – August 13, 2004) was an American chef, author and television personality, who introduced French cuisine and cooking techniques to the American mainstream, through her many cookbooks and television programs. Her most famous works are the 1961 cookbook Mastering the Art of French Cooking and, showcasing her sui generis television persona, the series The French Chef, which premiered in 1963.

In a new film due to be released in August this year Meryl Streep plays Julia child in this film writen and directed by Nora Ephron. The film intertwines the lives of Julia Child and Julia Powel (played by Amy Adams) and is based on her book Mastering the Art of French Cooking.

This is certainly a film I will add to must list.


Thursday 14 May 2009

Beef Curry - for 2 people (Double everything for 4)

I made this curry for the first time last night in my Shuttle Chef. Because of the lack of quantity I decided to cook it in a container and partly immerse it in water in the cooker. This way of cooking is ideal for meals that do not have much liquid content or if you are cooking just for one or two people.

Ingredients:

500g beef cut into 2-3cm cubes (you could use lamb if you prefer)
1 tbsp of ghee (I prefer ghee for flavour but vegetable oil can be used instead)
100g of yogurt
1/2 tsp of cornflour
100g tomatoes chopped and skinned (tinned tomatoes are ideal)
1 small onion chopped
2 cloves of garlic grated or chopped very finely
6 cardamoms (these need splitting open. I do this by squeezing )
2 bay leaves
1/2 tbsp of turmeric powder
1 tbsp of coriander powder
1/2 tbsp paprika
1/2 tsp chili powder
1 tsp of salt (check before serving and add a little more if needed)

Method: ( You will need a pot that fits in the inner pot of the thermal cooker. I use my 6" cake tin in mine. You will also need something to stand the tin on in the inner pot. A food ring would do fine.)


  1. Blend the cornflour with the yogurt in a bowl.

  2. In a frying pan add the ghee and garlic

  3. Heat the pan making sure the garlic does not burn.

  4. Add the meat and brown.

  5. Once browned add everything else and bring to the boil.

  6. Once boiling put it into you cake tin and cover with parchment paper or foil to form a lid. Also you will need to make a handle either with string or a sling out of foil so that you can easily lift out the tin when cooked.

  7. Put the food ring in the bottom of the thermal cooker inner pot.

  8. Fill with boiling water up to the top of the food ring.

  9. Put the cake tin into the inner pot.

  10. Carefully top up with boiling water by pouring down the side (making sure that you don't pour it over the lid you made to cover the cake tin) until it is about 3/4 of the way up the side of the tin.

  11. Put the inner pot onto a heat source and bring back to the boil.

  12. Once boiling put on the lid and turn down to a simmer.

  13. Simmer for 10 minutes then turn off the heat and put the inner pot into the thermal cooker outer pot and close the lid.

  14. Cook for a minimum of 3 hours. Longer wont be a problem.

  15. Serve with boiled rice.

Wednesday 13 May 2009

Christchurch Food & Wine Festival 9th & 10th of May

The weekend weather was really kind to and it definitely brought out the crowds. The streets were filled with over 100 stalls selling a great selection of food. Our stall, Mr D's Kitchen had a Chinese take away one side and man selling vodka the other. Behind us was Maguire's probably the smartest fish and chip shop I have every been in. All the fish is cooked to order and although this means a wait it was really worth it. This is fish and chips at their best.

We were very busy both days showing people the principles of thermal cooking and letting them taste the fruit cakes we made each night in our Shuttle Chef. I did not have time to have a really good look around the festival. I had intended to attend the demonstration by the Tanner brothers on Sunday but this never happened.

On Saturday Gary Rhodes and Lesley Walters were there demonstrating cooking in the Rangemaster Theatre while a friend of ours Ester Davis ran a Kid's Kitchen for children aged between 5 to 11.

The food and wine festival started on the 8th of May and goes on to the 17th. Although the street market is just the first weekend there are many activities going on the rest of the time.


The Shuttle Chef was as usual very well received in this time of credit cruntch and many people remembered using a hay box on which our thermal cooker is based. I did some demonstrating of cooking which was watched with interest and encouraged many questions as people tried to underrstand the principle of cooking without power.